“You’re not seriously making red velvet cookies with cream cheese inside, are you?” my cheeky roommate asked as I pulled out the bowl of bright red dough from the fridge. Honestly, I didn’t think this idea would fly at first either. The whole concept came about when I was craving red velvet cake but didn’t have the patience to bake a whole layer cake. I figured, why not stuff that luscious cream cheese filling inside a cookie? What started as a bit of kitchen experimentation quickly turned into a full-blown obsession—I ended up making these Perfect Cream Cheese Stuffed Red Velvet Crinkle Cookies three times in one week.
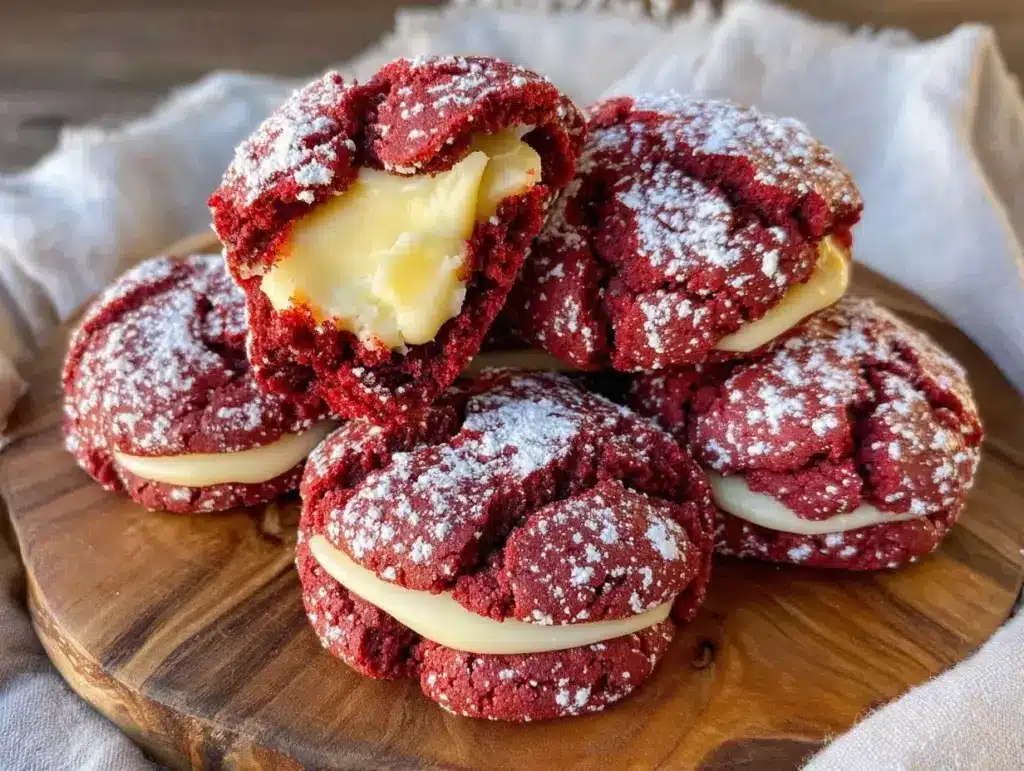
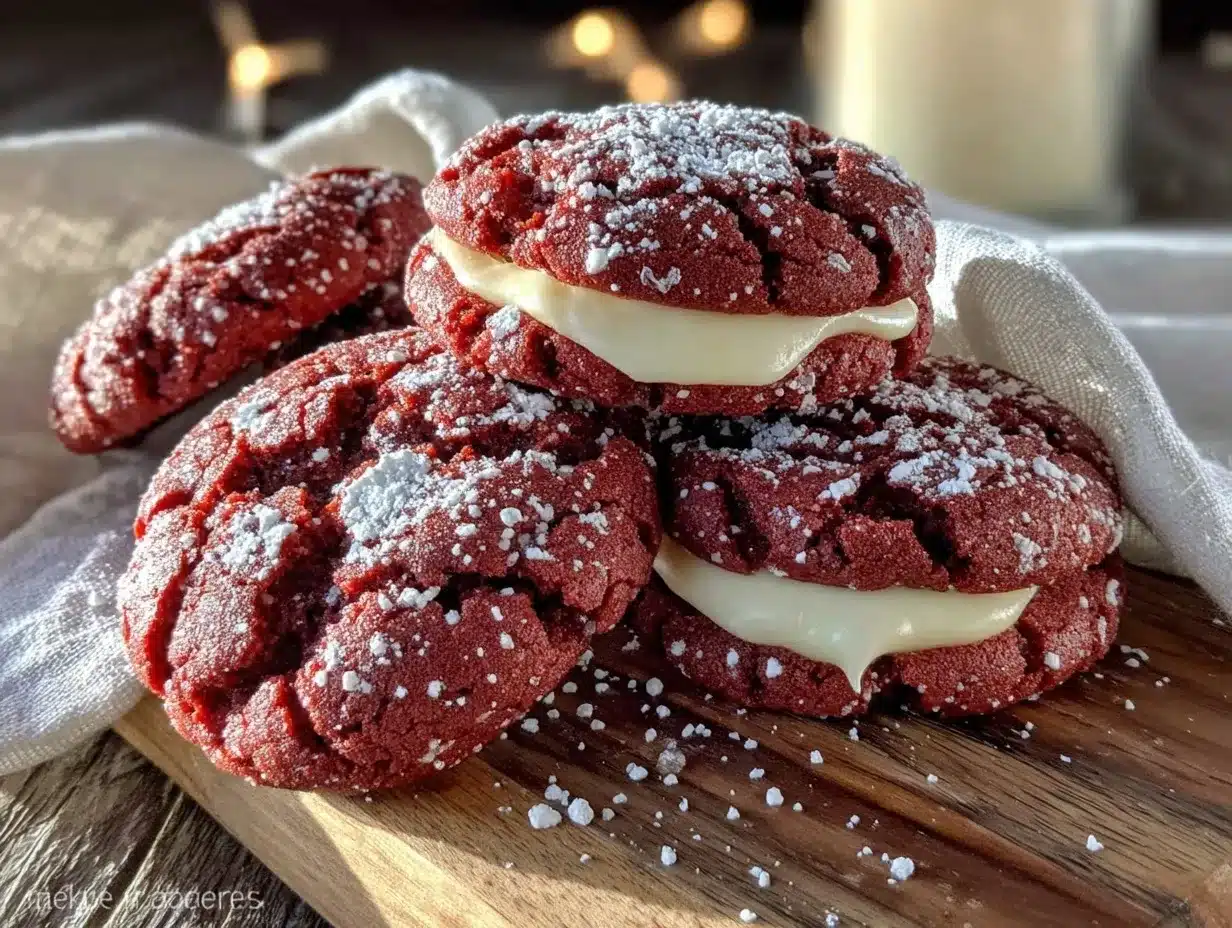
There’s something about the contrast—the tender, cakey red velvet cookie cradling a smooth, tangy cream cheese center—that just got me hooked. The crinkle effect on the outside adds a snowy-white crackle that makes these cookies look like little gems. Late at night, with the kitchen quiet except for the soft hum of the oven, I found myself savoring these cookies with a cup of tea, feeling like I’d stumbled onto a secret that’s too good not to share. It’s not just a cookie, really—it’s a cozy moment wrapped in festive colors and creamy goodness, perfect for any time you want a little sweet comfort without fuss.
Over time, this recipe stuck because it’s straightforward yet special enough to impress without stress. If you’re someone who loves a fun twist on classic flavors (and who doesn’t?), these red velvet crinkle cookies with cream cheese filling might just become your new go-to treat.
Why You’ll Love This Recipe
Having put these Perfect Cream Cheese Stuffed Red Velvet Crinkle Cookies through multiple rounds of testing, I can say with confidence this recipe nails the balance of flavor and texture every time. Here’s why it’s worth your kitchen time:
- Quick & Easy: Ready in about 30 minutes of active prep plus baking—ideal for busy evenings or last-minute celebrations.
- Simple Ingredients: Uses pantry staples and cream cheese you probably already have on hand, no fancy shopping required.
- Perfect for Special Occasions: The red velvet theme brings a festive vibe—great for Valentine’s Day, Christmas, or any time you want to wow guests.
- Crowd-Pleaser: Both kids and adults love these—soft on the outside, creamy surprise inside, and just the right amount of sweetness.
- Unbelievably Delicious: The cream cheese filling makes these cookies stand out from your typical red velvet cookies, offering a rich, tangy counterpoint that keeps you coming back for more.
What sets this recipe apart is the way the cream cheese center is encased and stays perfectly creamy without leaking or losing shape. Plus, the crinkle coating adds a playful texture and that signature snowy look, because let’s face it—presentation matters! I’ve tweaked the balance of cocoa and vanilla to keep these cookies sweet but not overpowering, making sure each bite feels like a small celebration. It’s not just another cookie recipe; it’s the one that makes you pause, close your eyes, and savor.
What Ingredients You Will Need
This recipe relies on simple, wholesome ingredients to create the perfect harmony of flavors and textures. Most are pantry staples, and substitutions are easy if needed.
- For the Cookie Dough:
- All-purpose flour – 2 ½ cups (315 grams)
- Unsweetened cocoa powder – ⅓ cup (35 grams), preferably Dutch-processed for richer flavor
- Baking powder – 1 teaspoon
- Salt – ½ teaspoon
- Granulated sugar – 1 ¾ cups (350 grams)
- Vegetable oil – ½ cup (120 ml), or melted coconut oil for slight coconut notes
- Eggs – 2 large, room temperature
- Buttermilk – ½ cup (120 ml), or plain yogurt as a substitute
- Vanilla extract – 2 teaspoons (real vanilla is key here)
- Red food coloring – 2 tablespoons, gel-based for vibrant color without altering dough consistency
- Powdered sugar – 1 cup (120 grams), for rolling the dough balls to create the classic crinkle effect
- For the Cream Cheese Filling:
- Cream cheese – 8 oz (225 grams), softened (I recommend Philadelphia for smooth texture)
- Granulated sugar – ⅓ cup (65 grams)
- Vanilla extract – 1 teaspoon
- Optional: a pinch of salt to balance sweetness
Feel free to swap all-purpose flour for a gluten-free flour blend if needed, though texture may vary slightly. For a dairy-free version, use vegan cream cheese and coconut yogurt instead of buttermilk. In summer months, you might enjoy adding a touch of fresh orange zest to the dough for a citrus twist.
Equipment Needed
- Mixing bowls – at least two, one for dough and one for cream cheese filling
- Electric mixer – hand or stand mixer to cream the filling and mix dough thoroughly
- Measuring cups and spoons – for precise ingredient amounts
- Rubber spatula – essential for scraping down bowl sides
- Baking sheets – standard size, lined with parchment paper or silicone mats
- Cooling rack – to let cookies cool evenly and prevent sogginess
- Spoon or small cookie scoop – for portioning dough and filling
If you don’t have an electric mixer, a sturdy whisk and some elbow grease will do, though the cream cheese filling will be easier to smooth with a mixer. Using parchment paper is a game-changer here—it keeps the bottoms from browning too much and makes cleanup a breeze. For budget-friendly baking sheets, classic aluminum pans work well, just watch your baking time as some conduct heat differently.
Preparation Method
- Prepare the Cream Cheese Filling: In a medium bowl, beat 8 oz (225 grams) softened cream cheese with ⅓ cup (65 grams) granulated sugar and 1 teaspoon vanilla extract until smooth and fluffy, about 2-3 minutes. Set aside in the fridge to firm up slightly while you prepare the dough.
- Mix Dry Ingredients: Whisk together 2 ½ cups (315 grams) all-purpose flour, ⅓ cup (35 grams) cocoa powder, 1 teaspoon baking powder, and ½ teaspoon salt in a large bowl. Set aside.
- Combine Wet Ingredients: In another bowl, beat 1 ¾ cups (350 grams) granulated sugar and ½ cup (120 ml) vegetable oil until well combined. Add 2 large eggs, one at a time, mixing well after each addition. Stir in ½ cup (120 ml) buttermilk, 2 teaspoons vanilla extract, and 2 tablespoons red food coloring until the mixture is evenly colored and smooth.
- Combine Wet and Dry Mixtures: Gradually add the dry ingredients to the wet mixture, stirring gently with a spatula or wooden spoon until just combined. Don’t overmix—the dough should be soft but not sticky.
- Chill the Dough: Cover the dough and refrigerate for at least 1 hour. This helps with rolling and keeps the cookies from spreading too much.
- Shape the Cookies: Preheat your oven to 350°F (175°C) and line baking sheets with parchment paper. Scoop about 2 tablespoons (30 grams) of dough and flatten it slightly in your hand. Place about 1 teaspoon of cream cheese filling in the center, then fold the dough around the filling to seal it completely, shaping the dough into a ball.
- Coat the Cookies: Roll each filled dough ball generously in powdered sugar until fully coated. This creates the iconic crinkle look as they bake.
- Bake: Arrange dough balls about 2 inches (5 cm) apart on the baking sheets. Bake for 12-14 minutes until the cookies are set but still soft in the center. You’ll see lovely cracks forming on the surface.
- Cool: Let cookies cool on the baking sheet for 5 minutes before transferring to a cooling rack. This helps the cream cheese center set and prevents breakage.
Watch your oven closely during that last few minutes. Overbaking will dry out the cream cheese center and toughen the cookie edges. If the cream cheese oozes out, check that your dough is cold enough before baking and that you fully seal the edges. These little tweaks made a big difference when I first started perfecting the recipe.
Cooking Tips & Techniques
Baking these Perfect Cream Cheese Stuffed Red Velvet Crinkle Cookies requires a few tricks to get just right. One lesson I learned was to chill the dough well before shaping; cold dough holds its shape better and prevents the filling from leaking out during baking. Also, when sealing the cream cheese filling inside, make sure to pinch the dough edges firmly but gently so you don’t tear the dough.
Using gel food coloring helps keep the dough vibrant without adding extra liquid that could mess with the texture. For the crinkle effect, don’t skimp on rolling the dough balls generously in powdered sugar—it creates that signature snowy crackle and keeps the cookies from sticking.
Another tip: bake one tray at a time if possible. Overcrowding your oven can cause uneven baking and less pronounced crinkles. While one batch is baking, you can start shaping the next to save time. And be patient with cooling! The cream cheese filling firms up best at room temperature, so don’t rush to bite into them right out of the oven.
Variations & Adaptations
Want to switch things up? Here are some ways I’ve played with this recipe:
- Chocolate Lovers’ Twist: Add mini chocolate chips to the dough for an extra chocolate punch. I did this once for a party, and they disappeared fast.
- Berry Filling: Swap the cream cheese center for a spoonful of raspberry jam mixed with cream cheese for a fruity surprise.
- Gluten-Free Option: Use a gluten-free flour blend like Bob’s Red Mill 1-to-1 baking flour. The texture is slightly different but still delightful.
- Vegan Version: Replace cream cheese with a dairy-free alternative and use flax eggs instead of regular eggs. Coconut yogurt works well instead of buttermilk.
- Spiced Up: Add a pinch of cinnamon or cayenne to the dry ingredients for warmth or a subtle kick.
For a different cooking method, these cookies can be frozen unbaked. Just shape and fill the dough balls, freeze on a tray, then transfer to a freezer bag. Bake straight from frozen, adding a few extra minutes to the baking time. This trick is perfect for holiday prep or when you want cookies ready on demand.
Serving & Storage Suggestions
Serve these cookies slightly warm or at room temperature to enjoy the cream cheese filling at its creamiest. They pair wonderfully with a glass of cold milk or a hot cup of coffee or tea. For a festive twist, sprinkle a little extra powdered sugar on top just before serving.
Store leftover cookies in an airtight container at room temperature for up to 3 days. For longer storage, keep them in the fridge for up to a week, or freeze baked cookies for up to 3 months. To reheat, pop them in the microwave for 10-15 seconds or warm in a low oven for a few minutes—just enough to soften the center again without melting the filling out.
Interestingly, the flavors meld and deepen a bit after a day, making these even more delightful if you can wait that long. I love packing a couple for afternoon treats or unexpected guests.
Nutritional Information & Benefits
Each Perfect Cream Cheese Stuffed Red Velvet Crinkle Cookie contains roughly 180-200 calories, with about 7 grams of fat and 25 grams of carbohydrates. The cream cheese filling adds a dose of calcium and protein, balancing the sweetness a bit. Using buttermilk or yogurt adds a slight tang and tenderness without extra fat.
This recipe can be adapted for gluten-free or vegan diets, making it accessible for many. While it’s definitely a treat, the simple ingredients and homemade quality mean you’re avoiding preservatives and artificial additives found in many store-bought cookies.
From a wellness perspective, sharing these cookies with friends or family can be a sweet way to foster connection and joy—a little indulgence that feels worth it.
Conclusion
These Perfect Cream Cheese Stuffed Red Velvet Crinkle Cookies have become one of my favorite ways to enjoy a classic flavor with a fun twist. The creamy center and crinkly exterior create a comforting treat that feels special but is surprisingly easy to make. Whether you stick to the original or try one of the variations, this recipe invites you to make it your own and savor every bite.
Give it a try when you want a dessert that’s both festive and homey without being complicated. I promise these cookies will bring a little extra warmth to your kitchen and smiles all around. If you make them, I’d love to hear how you customize the recipe or enjoy them best!
Frequently Asked Questions
Can I make these cookies ahead of time?
Yes! You can prepare and stuff the dough balls, then freeze them before baking. Bake directly from frozen, adding a couple of extra minutes to the baking time.
What can I use if I don’t have buttermilk?
Plain yogurt or milk mixed with 1 tablespoon of lemon juice or vinegar per ½ cup works well as a buttermilk substitute.
How do I keep the cream cheese filling from leaking?
Make sure the cream cheese is well chilled and the dough is cold before shaping. Seal the dough edges firmly around the filling without tearing the dough.
Can I use regular red food coloring instead of gel?
You can, but gel food coloring is better since it provides vibrant color without altering the dough’s texture.
Are these cookies suitable for freezing after baking?
Yes, baked cookies freeze well. Store in an airtight container and thaw at room temperature. Warm briefly before serving for best texture.
One last note—if you enjoy treats with a rich, cake-like crumb, you might also appreciate the Pink Strawberry Mimosa Pancakes or the Pink Velvet Cheesecake Swirl Brownies for your next sweet craving adventure.
Pin This Recipe!
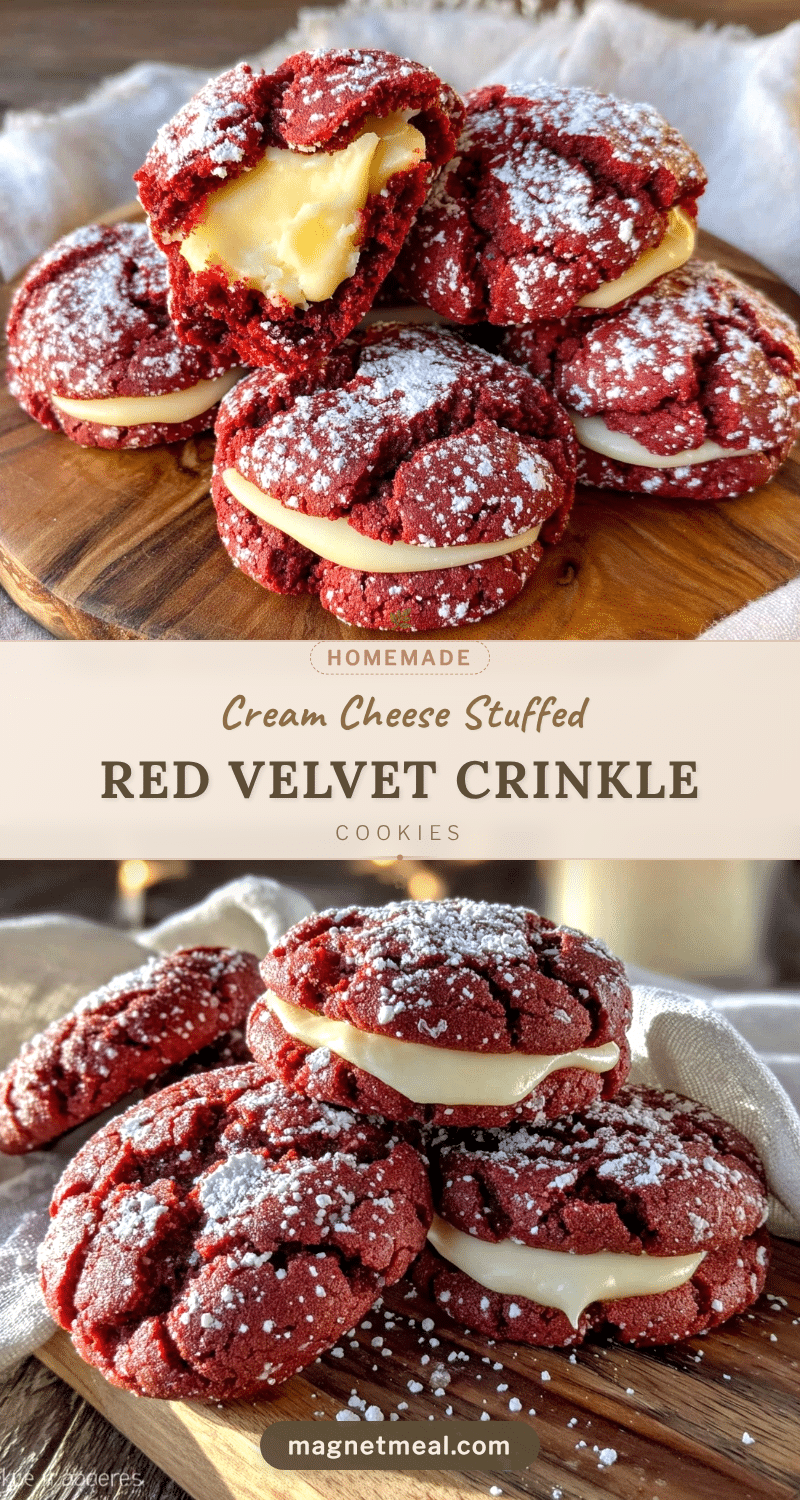
Perfect Cream Cheese Stuffed Red Velvet Crinkle Cookies
These red velvet crinkle cookies feature a tender, cakey exterior with a smooth, tangy cream cheese center, creating a festive and delicious treat perfect for any occasion.
- Prep Time: 30 minutes
- Cook Time: 14 minutes
- Total Time: 1 hour 44 minutes
- Yield: 24 cookies 1x
- Category: Dessert
- Cuisine: American
Ingredients
- 2 ½ cups (315 grams) all-purpose flour
- ⅓ cup (35 grams) unsweetened cocoa powder, preferably Dutch-processed
- 1 teaspoon baking powder
- ½ teaspoon salt
- 1 ¾ cups (350 grams) granulated sugar
- ½ cup (120 ml) vegetable oil or melted coconut oil
- 2 large eggs, room temperature
- ½ cup (120 ml) buttermilk or plain yogurt
- 2 teaspoons vanilla extract
- 2 tablespoons gel-based red food coloring
- 1 cup (120 grams) powdered sugar, for rolling
- 8 oz (225 grams) cream cheese, softened
- ⅓ cup (65 grams) granulated sugar
- 1 teaspoon vanilla extract
- Optional: a pinch of salt
Instructions
- Prepare the Cream Cheese Filling: Beat 8 oz softened cream cheese with ⅓ cup granulated sugar and 1 teaspoon vanilla extract until smooth and fluffy, about 2-3 minutes. Refrigerate to firm up.
- Mix Dry Ingredients: Whisk together 2 ½ cups all-purpose flour, ⅓ cup cocoa powder, 1 teaspoon baking powder, and ½ teaspoon salt in a large bowl.
- Combine Wet Ingredients: Beat 1 ¾ cups granulated sugar and ½ cup vegetable oil until combined. Add 2 eggs one at a time, mixing well after each. Stir in ½ cup buttermilk, 2 teaspoons vanilla extract, and 2 tablespoons red food coloring until smooth.
- Combine Wet and Dry Mixtures: Gradually add dry ingredients to wet mixture, stirring gently until just combined. Do not overmix.
- Chill the Dough: Cover and refrigerate dough for at least 1 hour.
- Shape the Cookies: Preheat oven to 350°F (175°C). Line baking sheets with parchment paper. Scoop about 2 tablespoons of dough, flatten slightly, place 1 teaspoon cream cheese filling in center, and seal dough around filling into a ball.
- Coat the Cookies: Roll each dough ball generously in powdered sugar until fully coated.
- Bake: Place dough balls 2 inches apart on baking sheets. Bake for 12-14 minutes until set but soft in center with cracks on surface.
- Cool: Let cookies cool on baking sheet for 5 minutes, then transfer to cooling rack.
Notes
Chill dough well before shaping to prevent filling leakage. Seal dough edges firmly but gently. Use gel food coloring for vibrant color without altering dough texture. Roll dough balls generously in powdered sugar for signature crinkle effect. Bake one tray at a time for even baking. Cool cookies before serving to let filling set.
Nutrition
- Serving Size: 1 cookie
- Calories: 190
- Sugar: 15
- Sodium: 120
- Fat: 7
- Saturated Fat: 3
- Carbohydrates: 25
- Fiber: 1
- Protein: 3
Keywords: red velvet cookies, cream cheese stuffed cookies, crinkle cookies, festive cookies, easy dessert, holiday cookies


