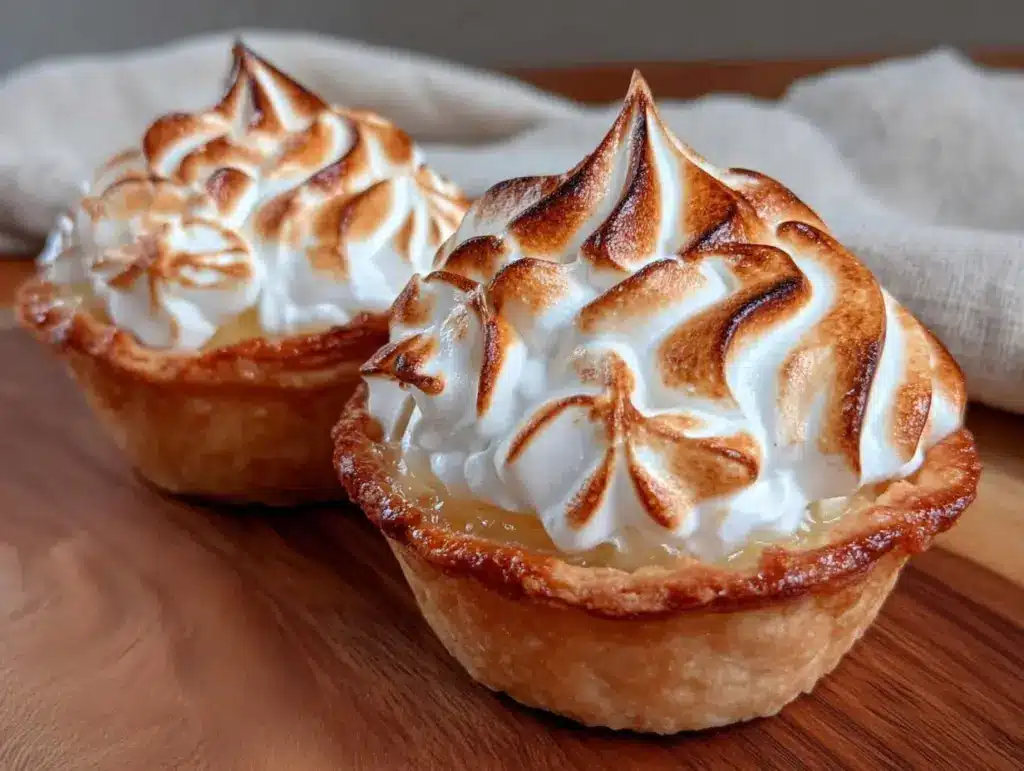
“Are you seriously torching the meringue?” my friend asked, raising an eyebrow as I carefully waved the kitchen torch over those tiny lemon meringue pie cups. Honestly, I was half-impressed with myself. It was late evening, and the kitchen smelled like a citrus grove kissed by toasted clouds. I’d whipped these up after a whirlwind day, craving something light yet indulgent, and the little cups turned into a bit of a revelation.
The idea started as a simple experiment — I wanted the classic lemon meringue flavor but in a portable, no-fuss form. Plus, I wasn’t in the mood to wrestle with a big pie crust. What began as a bit of a shortcut became a small obsession. I made these lemon meringue pie cups four times in one week, tweaking the balance between tangy lemon curd and the sweet, silky Swiss meringue until it was just right. The torching added that smoky, caramelized edge that turned the meringue from sweet fluff to a showstopper.
That night, as I handed out the first few cups, the silence that followed each bite was telling. It’s funny how something so simple can feel special — the perfect combo of tart, sweet, and toasted textures. I guess that’s why this recipe stuck with me; it’s a little moment of joy you can make anytime, no fancy equipment beyond a torch, and zero stress.
So yeah, if you’re like me — juggling a thousand things but still wanting to treat yourself or impress without the drama — these lemon meringue pie cups might just become your new secret weapon. They’re sweet, tangy, fun to make, and honestly, pretty hard to resist.
Why You’ll Love This Recipe
From the first time I made these lemon meringue pie cups, I knew they were something special. After a few trials and a couple of burnt meringue moments (don’t worry, I’ve learned a lot since then), this recipe has become a reliable crowd-pleaser in my kitchen. Here’s why you’ll want to keep this recipe handy:
- Quick & Easy: Ready in under 45 minutes, perfect when you need a sweet treat without the hassle.
- Simple Ingredients: No need for fancy shopping trips — just pantry staples and fresh lemons.
- Perfect for Parties: These mini cups are ideal for potlucks, dessert buffets, or just a casual sweet bite after dinner.
- Crowd-Pleaser: Kids, adults, neighbors — everyone asks for seconds (and sometimes thirds).
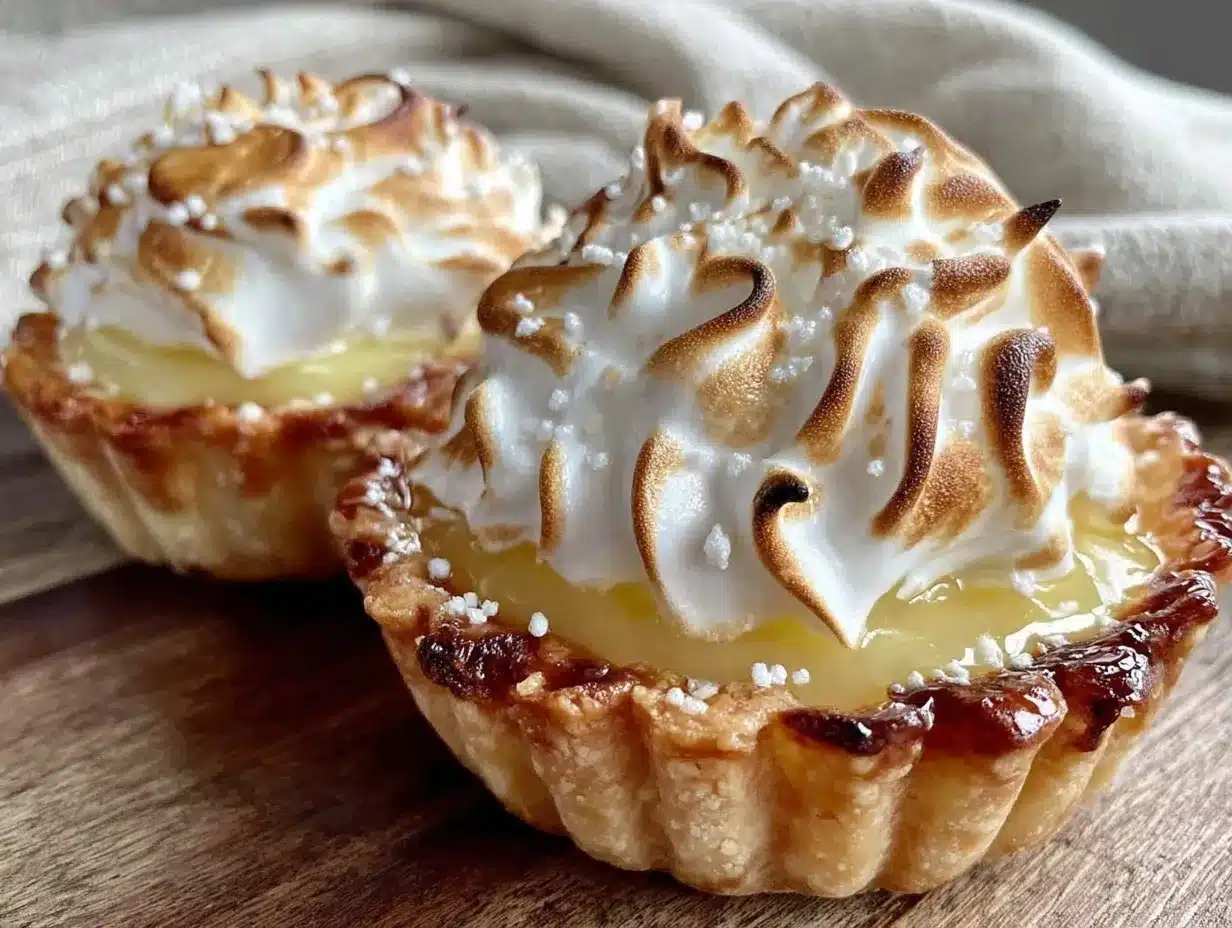
- Unbelievably Delicious: The silky lemon curd contrasts beautifully with the airy, torched Swiss meringue topping.
- Unique Twist: The torching step crisps up the meringue, adding a subtle smoky flavor and stunning golden color that’s hard to beat.
This isn’t just another lemon meringue pie recipe. The mini cups make portion control easy, and the Swiss meringue method results in a glossy, stable topping that holds up longer than your typical meringue. Plus, the torched finish adds a restaurant-quality touch that makes this recipe feel fancy without the fuss. If you love the brightness of lemon and the creaminess of meringue but don’t want to spend hours baking, this is the one you’ll keep coming back to.
What Ingredients You Will Need
This recipe uses simple, wholesome ingredients to deliver bold flavor and satisfying texture without the fuss. All the ingredients are easy to find and mostly pantry staples, with fresh lemon juice bringing that vibrant punch.
- For the Lemon Curd:
- Fresh lemon juice (about 1/2 cup or 120 ml) — the star of the show
- Lemon zest (from 2 medium lemons) — adds extra zing
- Granulated sugar (3/4 cup or 150 g) — balances the tartness
- Large egg yolks (4) — for richness and texture
- Unsalted butter (6 tablespoons or 85 g), softened — adds creaminess
- For the Swiss Meringue:
- Large egg whites (4), room temperature — whip these to glossy peaks
- Granulated sugar (3/4 cup or 150 g) — slowly dissolved for silky smoothness
- Pinch of cream of tartar (optional) — helps stabilize the meringue
- Vanilla extract (1 teaspoon) — for subtle sweetness
- For the Cups:
- Pre-made mini tart shells or cookie cups (about 12) — saves time and adds crunch
- Optional: powdered sugar for dusting
If you want to make your own tart shells, feel free to swap in a simple shortcrust pastry recipe. For a gluten-free option, almond flour-based shells work beautifully. Using fresh lemons is a must here — the bright citrus flavor is what makes these cups sing. I tend to buy organic lemons when I can, especially since the zest is so important.
Equipment Needed
- Mixing bowls — glass or stainless steel recommended for whipping egg whites
- Electric mixer or stand mixer — essential for whipping the Swiss meringue to stiff peaks
- Small saucepan — to gently cook the lemon curd
- Whisk — for stirring lemon curd constantly to avoid lumps
- Silicone spatula — great for folding and scraping
- Kitchen torch — the magic wand to brown the meringue perfectly (a handheld propane torch works best)
- Measuring cups and spoons — for precise ingredient amounts
- Optional: fine grater or zester — for zesting lemons quickly
If you don’t have a kitchen torch, you can brown the meringue under a broiler, but keep a close eye — it browns fast and unevenly. I personally find investing in a torch worthwhile; it’s handy for so many desserts, including birthday cakes and other treats. For mixing, a stand mixer really speeds things up, but a hand mixer works fine too.
Preparation Method
- Make the Lemon Curd (15-20 minutes): In a small saucepan, combine fresh lemon juice, lemon zest, sugar, and egg yolks. Whisk constantly over medium-low heat to prevent curdling. The mixture will thicken slowly — as soon as it coats the back of a spoon (about 170°F/77°C), remove from heat. Stir in softened butter until fully melted and smooth. Transfer to a bowl and cover with plastic wrap pressed directly on the surface to avoid a skin. Chill until set, about 1 hour.
- Prepare the Swiss Meringue (10-15 minutes): In a heatproof bowl, combine egg whites, sugar, and cream of tartar (if using). Place the bowl over a pot of simmering water (double boiler) and whisk constantly until the sugar dissolves and the mixture reaches 160°F (71°C). Remove from heat and beat with an electric mixer on high speed until stiff, glossy peaks form and the bowl feels cool to the touch (about 5-7 minutes). Stir in vanilla extract.
- Fill the Tart Cups (5 minutes): Spoon or pipe the chilled lemon curd into each mini tart shell, filling about three-quarters full.
- Pipe or Spoon Meringue Topping (5 minutes): Using a piping bag or a spoon, mound the Swiss meringue generously on top of each cup, swirling as you go for texture and height.
- Torch the Meringue (5 minutes): Carefully brown the meringue using your kitchen torch, moving the flame evenly to avoid burning. Aim for a golden, slightly charred finish that smells smoky and sweet.
- Serve or Chill: These cups can be served immediately or chilled for up to 2 hours before serving. If chilled, let them sit at room temperature for 10 minutes to soften the meringue slightly.
Pro tip: If your lemon curd curdles or feels grainy, strain it through a fine mesh sieve before chilling. Also, don’t rush the meringue whipping — the stable peaks are key to holding their shape when torched.
Cooking Tips & Techniques
Getting the perfect torched Swiss meringue topping takes a little practice but is totally worth it. Here’s what I’ve learned from messing around in my kitchen:
- Temperature Matters: Always bring your egg whites and sugar to about 160°F (71°C) over simmering water. This kills any bacteria and dissolves the sugar for a silky texture.
- Whip to Stiff Peaks: Don’t stop beating until the meringue holds stiff peaks and the bowl is no longer warm. This ensures it’s stable enough to torch without collapsing.
- Slow and Steady Torch: Keep the flame moving in circular motions and hold it a few inches above the meringue. Too close, and it burns; too far, and it barely browns.
- Use Fresh Lemons: The brightness of fresh lemon juice and zest makes all the difference. Bottled lemon juice just can’t compete here.
- Chill Lemon Curd: Letting the lemon curd fully set before filling helps it hold shape in the cups.
- Don’t Skip the Cream of Tartar: It’s optional but helps stabilize your meringue, especially if your egg whites aren’t super fresh.
Once, I tried torching the meringue with a lighter (yes, a lighter!) and learned the hard way that the result wasn’t as even or pretty. Trust me — a kitchen torch is a worthy investment. For a fun twist, try pairing these lemon meringue pie cups with a light tea or a sparkling cocktail. If you’re interested in other elegant desserts you can make at home, you might like my emerald green defying gravity layer cake — it’s a showstopper too!
Variations & Adaptations
These lemon meringue pie cups are super adaptable, so feel free to mix things up based on what you have or your taste preferences:
- Berry Twist: Add a spoonful of fresh raspberries or blueberries on top of the lemon curd before piping the meringue for a fruity pop and color contrast.
- Chocolate Base: Swap out the tart shells for mini chocolate cookie cups or brownie bites for a richer dessert experience.
- Dairy-Free Version: Use coconut oil instead of butter in the lemon curd and substitute the meringue with a whipped aquafaba topping for a vegan-friendly option.
- Less Sweet: Reduce sugar in the lemon curd by 1/4 cup (50 g) if you prefer a more tart bite.
- Seasonal Citrus: Try using blood oranges or limes instead of lemons for a seasonal twist that still brightens the palate.
Personally, I once made a batch with a dash of ginger in the lemon curd — it added a lovely warmth that surprised everyone. Also, if you want to serve a more substantial dessert alongside, these lemon meringue pie cups complement savory dishes like my classic tuna melt on sourdough bread or even a fresh salad dinner.
Serving & Storage Suggestions
Serve these lemon meringue pie cups fresh at room temperature for the best texture contrast — tangy, creamy curd with soft, toasted meringue. They’re perfect as finger food for parties or a fancy finish to a casual dinner.
If you want to prep ahead, store the filled and meringue-topped cups in an airtight container in the refrigerator for up to 24 hours. Just bring them to room temperature for about 15 minutes before serving to let the flavors and textures relax. Avoid freezing as the meringue texture doesn’t hold up well.
For reheating, a quick pass under a broiler for 10-15 seconds can help revive the toasted meringue look if it’s dulled in the fridge. Pair these lemon treats with a cup of Earl Grey tea or a chilled glass of Prosecco for a delightful balance of flavors.
Nutritional Information & Benefits
Each lemon meringue pie cup is a modest portion, making it easier to enjoy dessert without overdoing it. Here’s a rough estimate per cup:
| Calories | 180-200 |
|---|---|
| Fat | 9-11 grams |
| Carbohydrates | 25 grams |
| Protein | 2-3 grams |
| Sugar | 20 grams |
Lemons provide vitamin C and antioxidants, which support immunity and skin health. The egg whites in the Swiss meringue add some protein while keeping the topping light. If you use butter in the curd, it adds richness and fat-soluble vitamins. For those with gluten sensitivities, swapping the tart shells for gluten-free bases lets you still enjoy this dessert without worry.
Conclusion
These perfect lemon meringue pie cups with torched Swiss meringue are one of those recipes that make you feel like a dessert pro without spending hours in the kitchen. They’re bright, creamy, and just the right size to satisfy your sweet tooth. What I love most is how versatile they are — easy to tweak for different occasions, dietary needs, or flavor cravings.
Next time you want to impress without stress, pull out this recipe. Play with the torching, try different tart shells, or sneak in a seasonal fruit. And if you have a moment, I’d love to hear how you made them your own or what creative twists you discovered!
Happy baking!
Frequently Asked Questions about Lemon Meringue Pie Cups
- Can I make the lemon curd ahead of time?
Yes! Lemon curd can be made up to 3 days in advance and stored in the fridge. Just cover it well to prevent a skin from forming. - What if I don’t have a kitchen torch?
You can brown the meringue under a broiler for 1-2 minutes, watching closely to avoid burning. A kitchen torch gives better control and even browning. - Can I use store-bought lemon curd?
Absolutely, but homemade lemon curd is fresher and less sweet. If you use store-bought, reduce added sugar in the meringue slightly to balance. - How do I know when the Swiss meringue is ready?
It should be glossy, thick, and hold stiff peaks. The bowl will also feel cool to the touch once fully whipped. - Can I freeze these lemon meringue pie cups?
It’s not recommended as the meringue texture suffers when frozen and thawed. Best to enjoy them fresh or refrigerated short-term.
Pin This Recipe!
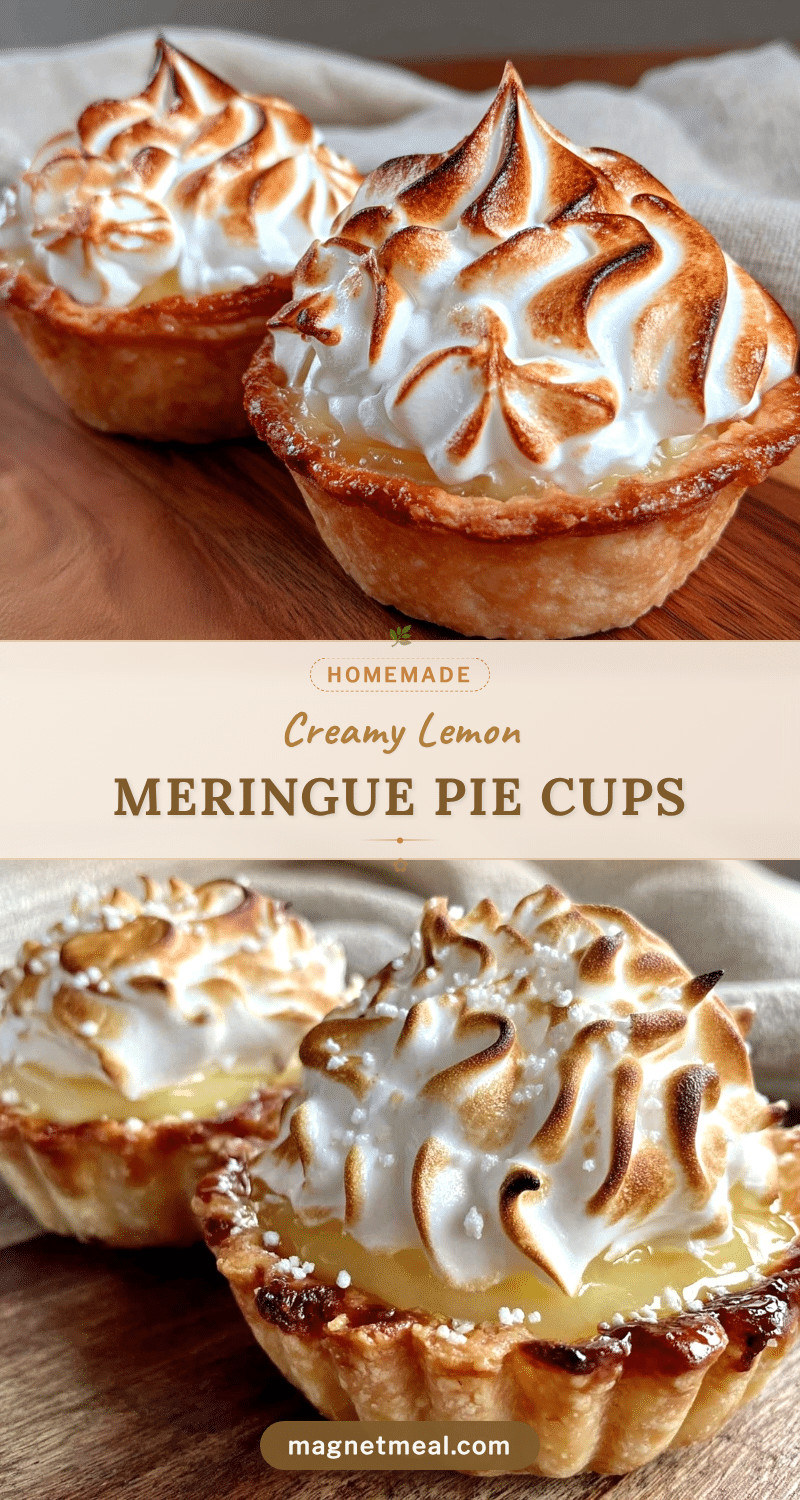
Perfect Lemon Meringue Pie Cups Recipe Easy Homemade Torched Swiss Meringue

These lemon meringue pie cups offer a portable, no-fuss twist on the classic lemon meringue pie, featuring tangy lemon curd and silky torched Swiss meringue in mini tart shells.
- Prep Time: 15 minutes
- Cook Time: 20 minutes
- Total Time: 45 minutes
- Yield: 12 servings
- Category: Dessert
- Cuisine: American
Ingredients
- Fresh lemon juice (about 1/2 cup or 120 ml)
- Lemon zest (from 2 medium lemons)
- Granulated sugar (3/4 cup or 150 g)
- Large egg yolks (4)
- Unsalted butter (6 tablespoons or 85 g), softened
- Large egg whites (4), room temperature
- Granulated sugar (3/4 cup or 150 g)
- Pinch of cream of tartar (optional)
- Vanilla extract (1 teaspoon)
- Pre-made mini tart shells or cookie cups (about 12)
- Optional: powdered sugar for dusting
Instructions
- Make the Lemon Curd (15-20 minutes): In a small saucepan, combine fresh lemon juice, lemon zest, sugar, and egg yolks. Whisk constantly over medium-low heat to prevent curdling. The mixture will thicken slowly — as soon as it coats the back of a spoon (about 170°F/77°C), remove from heat. Stir in softened butter until fully melted and smooth. Transfer to a bowl and cover with plastic wrap pressed directly on the surface to avoid a skin. Chill until set, about 1 hour.
- Prepare the Swiss Meringue (10-15 minutes): In a heatproof bowl, combine egg whites, sugar, and cream of tartar (if using). Place the bowl over a pot of simmering water (double boiler) and whisk constantly until the sugar dissolves and the mixture reaches 160°F (71°C). Remove from heat and beat with an electric mixer on high speed until stiff, glossy peaks form and the bowl feels cool to the touch (about 5-7 minutes). Stir in vanilla extract.
- Fill the Tart Cups (5 minutes): Spoon or pipe the chilled lemon curd into each mini tart shell, filling about three-quarters full.
- Pipe or Spoon Meringue Topping (5 minutes): Using a piping bag or a spoon, mound the Swiss meringue generously on top of each cup, swirling as you go for texture and height.
- Torch the Meringue (5 minutes): Carefully brown the meringue using your kitchen torch, moving the flame evenly to avoid burning. Aim for a golden, slightly charred finish that smells smoky and sweet.
- Serve or Chill: These cups can be served immediately or chilled for up to 2 hours before serving. If chilled, let them sit at room temperature for 10 minutes to soften the meringue slightly.
Notes
If lemon curd curdles or feels grainy, strain it through a fine mesh sieve before chilling. Don’t rush whipping the meringue; stable stiff peaks are key for torching. If no kitchen torch is available, use a broiler but watch closely to avoid burning. Fresh lemons are essential for best flavor. Lemon curd can be made up to 3 days ahead and stored in the fridge. Avoid freezing the finished cups as meringue texture suffers.
Nutrition
- Serving Size: 1 mini tart cup
- Calories: 190
- Sugar: 20
- Sodium: 50
- Fat: 10
- Saturated Fat: 6
- Carbohydrates: 25
- Protein: 3
Keywords: lemon meringue, lemon meringue pie cups, Swiss meringue, torched meringue, lemon curd, mini tart dessert, easy lemon dessert, portable lemon meringue


