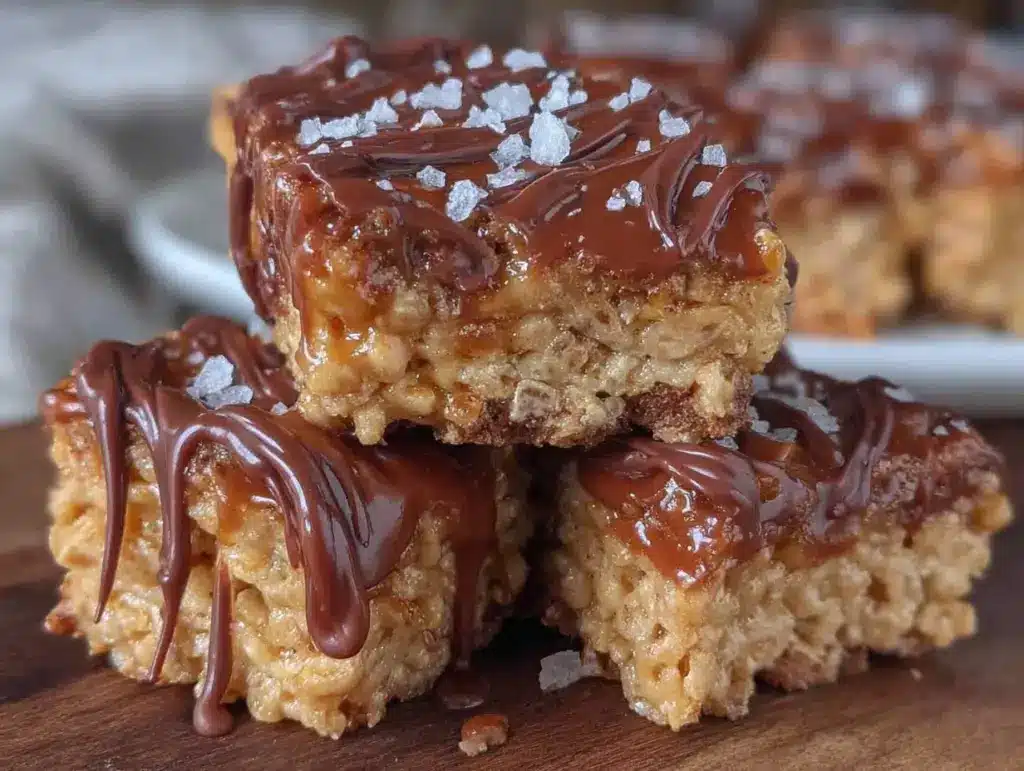
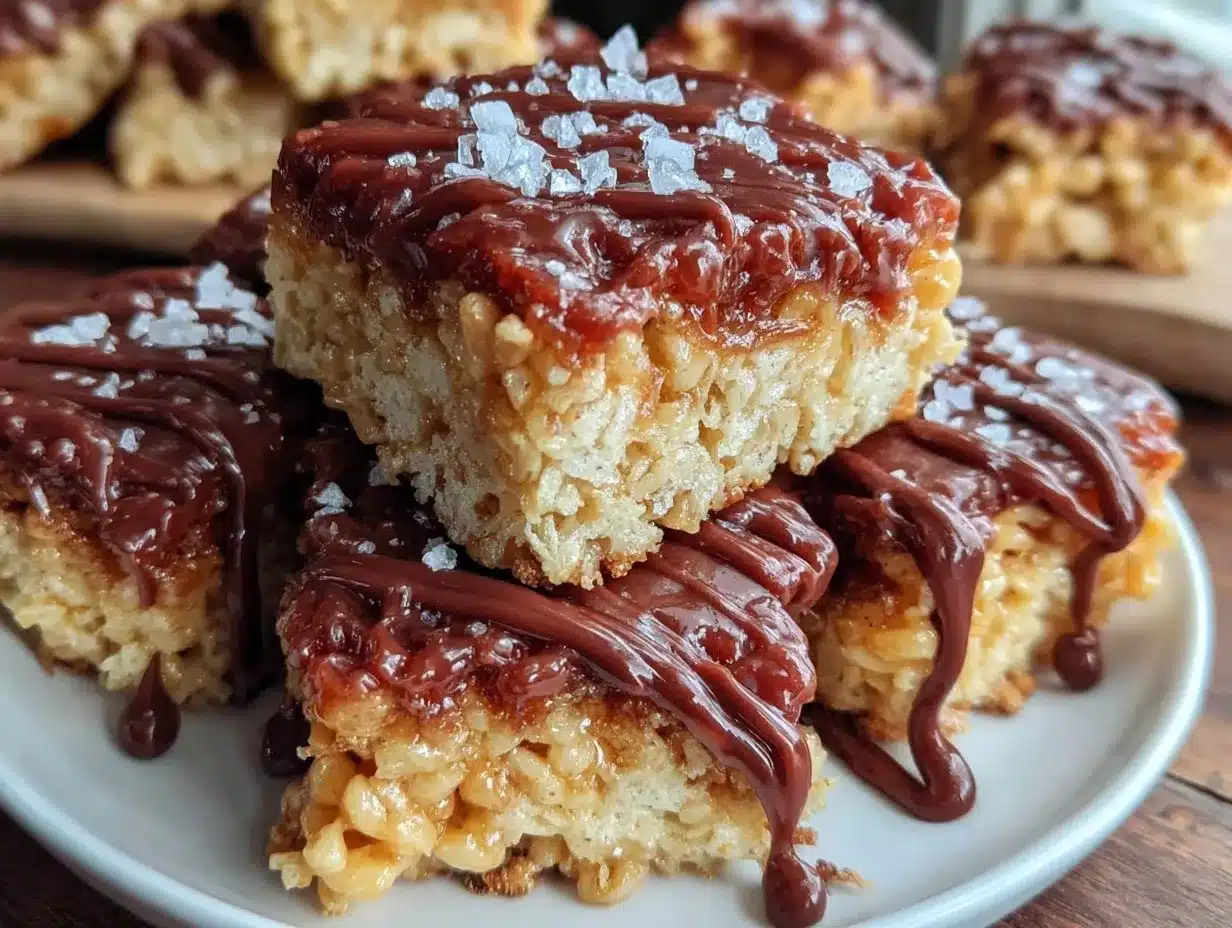
“Wait, did you just say brown butter and salted caramel in Rice Krispie treats?” my friend asked skeptically as I pulled these golden squares from the pan. Honestly, I wasn’t sure how this twist on a childhood classic would go over either, but something about swirling dark chocolate into warm, nutty brown butter and sticky salted caramel just felt right. The first time I made these delicious Brown Butter Salted Caramel Rice Krispie Treats with Dark Chocolate, it was more of a whim than a plan—leftover butter that was past its prime, a bag of marshmallows begging for attention, and a craving for something sweet that wasn’t the usual.
The kitchen filled with this cozy, nutty aroma that instantly shifted my mood after a hectic day. And when I bit into that first square, the combination of crunchy cereal, rich caramel, and bittersweet chocolate felt like a little celebration in my mouth. It wasn’t just a snack; it was a moment of comfort and surprise all at once. Since then, I’ve found myself making these treats repeatedly, each batch slightly tweaked but always hitting that perfect harmony of flavors. They’re the kind of dessert that makes you pause and appreciate the simple things—except with a grown-up twist that keeps you coming back for more.
These treats remind me a bit of the indulgence in my stunning pink and green ombre wicked birthday cake, where the familiar feels new again. But here, it’s all about that cozy, effortless magic you can whip up in minutes, with ingredients you probably already have. Let’s just say, once you’ve tried this recipe, your idea of Rice Krispie treats might never be the same.
Why You’ll Love This Recipe
After countless trials in my kitchen, these Brown Butter Salted Caramel Rice Krispie Treats with Dark Chocolate have become a reliable crowd-pleaser. Here’s what makes them stand out:
- Quick & Easy: Ready in under 30 minutes, perfect for those evenings when you need a sweet fix, stat.
- Simple Ingredients: No need for specialty stores—just pantry staples with a touch of gourmet flair.
- Perfect for Any Occasion: Whether it’s a cozy night in, a potluck, or an impromptu dessert, these treats hit the spot.
- Crowd-Pleaser: Kids love the familiar crunch, adults adore the caramel and chocolate complexity.
- Unbelievably Delicious: Brown butter’s nutty depth paired with salted caramel and dark chocolate creates a flavor combo that’s downright addictive.
This isn’t your run-of-the-mill Rice Krispie treat. The magic comes from browning the butter first, which adds a warm, toasty note that transforms the whole dessert. Adding salted caramel introduces that perfect sweet-salty balance, while dark chocolate gives it enough richness to feel special without overpowering the cereal’s crunch. Honestly, it’s like the dessert version of comfort food that wears a little tuxedo. If you’ve ever been curious about mixing simple snacks with gourmet touches, this recipe is a great starting point—one that’s both approachable and impressive.
What Ingredients You Will Need
This recipe uses simple, wholesome ingredients to deliver bold flavor and satisfying texture without the fuss. Most of these are pantry staples, but I’ve included some tips for picking the best versions to maximize flavor.
- Unsalted Butter, 1/2 cup (115g), browned – brings that rich, nutty flavor; I like using Kerrygold for its creaminess.
- Mini Marshmallows, 10 oz (about 280g) – choose fresh mini marshmallows for best melt and texture.
- Rice Krispies Cereal, 6 cups (150g) – classic crispiness; any puffed rice cereal works in a pinch.
- Salted Caramel Sauce, 1/2 cup (120ml) – homemade or store-bought (I recommend Trader Joe’s for a quick option), adds the sweet and salty punch.
- Dark Chocolate Chips, 1 cup (170g) – 60-70% cocoa for that bittersweet contrast; Ghirardelli is my go-to.
- Sea Salt, 1/2 teaspoon – flaky salt sprinkled on top for extra crunch and flavor pop.
Substitutions: Use coconut oil instead of butter for a dairy-free version, and swap coconut sugar caramel sauce for a vegan alternative. If you want a gluten-free treat, make sure your cereal is certified gluten-free.
Equipment Needed
- Large saucepan or skillet – for browning butter and melting marshmallows.
- Large mixing bowl – to combine the cereal with the marshmallow mixture.
- Spatula (preferably silicone) – helps scrape the pan clean and evenly mix ingredients.
- 9×13 inch baking dish or pan – for shaping the treats; line with parchment paper for easy removal.
- Measuring cups and spoons – accurate measurements are key for texture here.
If you don’t have a heavy-bottomed pan for browning butter, a stainless steel skillet works fine, but watch closely to avoid burning. I find silicone spatulas best for scraping down the sticky caramel mixture without losing any of that buttery goodness. For budget-friendly options, a glass baking dish can replace metal pans, just keep an eye on cooking times if you warm the treats slightly before serving.
Preparation Method
- Brown the butter: Place the unsalted butter in a large saucepan over medium heat. Stir constantly as it melts and begins to foam. After about 5-7 minutes, it will turn a golden-brown color and smell nutty. Be careful not to burn it! Immediately remove from heat.
- Add marshmallows: To the browned butter, add the mini marshmallows. Stir continuously until the marshmallows are completely melted and the mixture is smooth, about 3-5 minutes.
- Mix in salted caramel: Pour in the salted caramel sauce and stir until fully incorporated. The mixture should be glossy and thick.
- Combine with cereal: Transfer the saucepan off the heat. Add the Rice Krispies cereal in batches, folding gently with a spatula to coat every piece evenly without crushing the cereal.
- Add dark chocolate: While the mixture is still warm but not hot, fold in about 3/4 cup (130g) of the dark chocolate chips. The heat will soften the chips slightly, creating pockets of melted chocolate.
- Press into pan: Quickly spread the mixture evenly into the prepared 9×13 inch pan lined with parchment paper. Use a buttered spatula or wax paper to press down firmly but gently to avoid compacting the treats too much.
- Top with remaining chocolate and sea salt: Sprinkle the remaining 1/4 cup (40g) of dark chocolate chips evenly on top, pressing lightly so they stick. Finish with a light dusting of flaky sea salt.
- Cool and set: Let the treats cool completely at room temperature for about 1 hour to firm up. For faster setting, place in the refrigerator for 20-30 minutes.
- Slice and serve: Once set, lift the treats out using the parchment paper and cut into squares with a sharp knife. Enjoy immediately or store as described below.
Tips: If your marshmallow mixture starts to set too fast, warm it gently over low heat to loosen before adding cereal. Also, don’t skip the parchment paper—it makes cleanup way easier and keeps the treats from sticking.
Cooking Tips & Techniques
Brown butter is the star here, but it can be tricky. Stir constantly and watch the color and smell closely. Once it smells nutty and turns golden, pull the pan off heat immediately to avoid bitterness. Trust me, burnt butter is not the vibe!
When melting marshmallows, low and slow wins the race. Too high heat and you risk scorching or uneven melting. Using mini marshmallows instead of large ones helps them melt faster and distribute evenly.
Folding the cereal gently is key to keeping that satisfying crunch. Pressing the mixture into the pan too hard can make the treats dense and chewy instead of light and crispy.
For perfectly melted pockets of chocolate, add most chips into the warm mixture and the rest on top to create a visually appealing, glossy finish. Don’t forget the sea salt—it’s a small touch that makes a big difference.
Lastly, timing your prep so you can serve these treats fresh offers the best texture and flavor experience. If you’re in a rush, chilling in the fridge helps firm them up quickly without drying them out.
Variations & Adaptations
These treats are versatile and forgiving, so feel free to experiment:
- Nutty Twist: Add 1/2 cup chopped toasted pecans or walnuts with the cereal for extra crunch and flavor.
- Peanut Butter Swirl: Melt 1/3 cup peanut butter with the marshmallows for a rich, nutty variation that pairs beautifully with the dark chocolate.
- Seasonal Flair: Swap salted caramel for pumpkin spice caramel sauce in fall, or use fresh berries folded into the cereal for a fruity summer take (try this approach in my pink strawberry mimosa pancakes recipe for inspiration).
- Dairy-Free Option: Use coconut oil instead of butter and vegan marshmallows to keep things plant-based.
- Chocolate Variety: Swap dark chocolate for milk or white chocolate chips depending on your sweet tooth. I once tried a mix of dark and chili-flavored chocolate for a surprising kick.
Serving & Storage Suggestions
These treats are best served at room temperature so the chocolate pockets are just slightly melty, but not messy. They make a fantastic after-school snack, a fun party dessert, or a sweet end to a cozy dinner.
Pair them with a glass of cold milk, a cup of coffee, or even a rich hot chocolate for a comforting combo. I sometimes bring these along with my classic tuna melt lunch for a sweet finish that feels homemade and satisfying.
Store leftovers in an airtight container at room temperature for up to 3 days. To keep them fresh longer, refrigerate for up to a week—just let them come back to room temp before serving. You can also freeze the bars wrapped tightly in plastic wrap and foil for up to 3 months. Thaw overnight in the fridge, then enjoy!
Note that the flavors deepen over time, especially the caramel and chocolate, making the treats even more indulgent the next day.
Nutritional Information & Benefits
Each serving (about one square) has roughly 200-250 calories depending on size, with a balance of carbohydrates from the cereal and marshmallows, fats from the brown butter and chocolate, and a touch of protein from the nuts if added.
Brown butter adds a dose of healthy fats and antioxidants thanks to the milk solids’ transformation during browning. Dark chocolate provides antioxidants and minerals like magnesium, making it a better choice than sweeter chocolates.
This recipe is naturally gluten-free if you choose certified gluten-free Rice Krispies and is low in added preservatives. The salted caramel adds flavor depth without excess sugar since the caramel sauce is used sparingly.
If you have dietary restrictions, this treat can be adapted for vegan or dairy-free diets as noted earlier, making it a flexible dessert option.
Conclusion
These Delicious Brown Butter Salted Caramel Rice Krispie Treats with Dark Chocolate have become a favorite in my kitchen for their effortless charm and grown-up flavor punch. The blend of nutty brown butter, sweet-salty caramel, and rich dark chocolate transforms a simple childhood snack into something a little more special. I encourage you to tweak the recipe to suit your taste and enjoy the process as much as the outcome.
Whether you’re looking for a quick dessert to impress guests or a sweet treat to lift a busy day, these are surprisingly simple and always satisfying. If you try them, I’d love to hear how you customized the recipe or what moments they made sweeter in your life.
Here’s to cozy kitchens and delicious, unexpected treats!
FAQs
Can I use regular butter instead of unsalted butter?
Yes, but reduce or omit added salt since regular butter contains salt. Unsalted butter gives you better control over seasoning.
What type of caramel sauce works best?
Homemade salted caramel is fantastic, but good-quality store-bought caramel like Trader Joe’s or local brands work well too.
How do I prevent the treats from being too sticky?
Make sure to press the mixture firmly but not too hard into the pan and let them cool completely before cutting. Chilling helps as well.
Can I make these ahead of time?
Absolutely! They store well in an airtight container for several days and freeze nicely for longer storage.
What’s the best way to cut these treats cleanly?
Use a sharp knife and wipe the blade clean between cuts. You can also warm the knife slightly under hot water and dry it for smoother slicing.
Pin This Recipe!
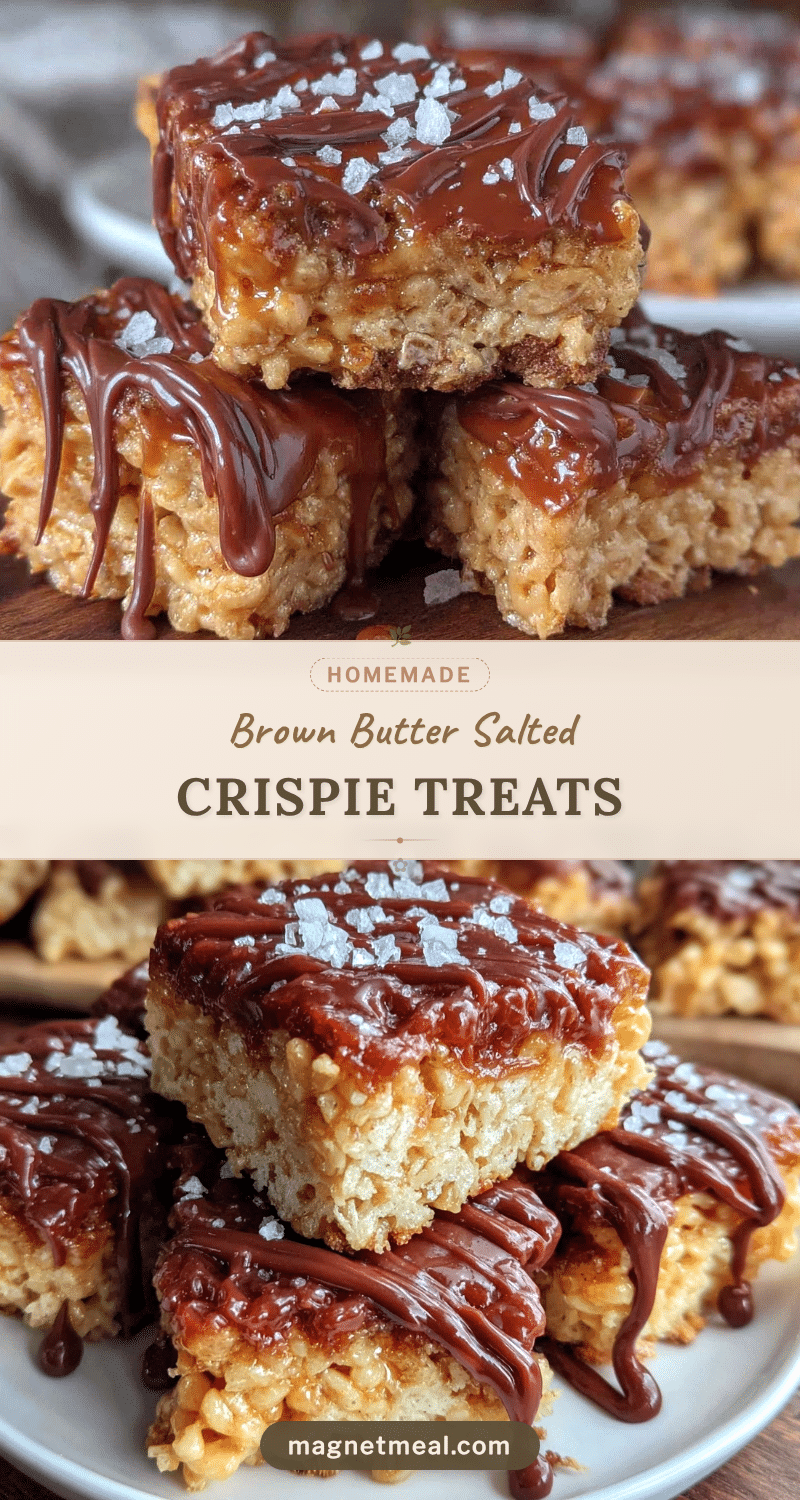
Delicious Brown Butter Salted Caramel Rice Krispie Treats
A grown-up twist on classic Rice Krispie treats featuring nutty brown butter, sweet and salty caramel, and rich dark chocolate for a comforting and addictive dessert.
- Prep Time: 10 minutes
- Cook Time: 15 minutes
- Total Time: 1 hour 25 minutes
- Yield: 16 servings 1x
- Category: Dessert
- Cuisine: American
Ingredients
- 1/2 cup (115g) unsalted butter, browned
- 10 oz (about 280g) mini marshmallows
- 6 cups (150g) Rice Krispies cereal
- 1/2 cup (120ml) salted caramel sauce
- 1 cup (170g) dark chocolate chips (60-70% cocoa)
- 1/2 teaspoon flaky sea salt
Instructions
- Brown the butter: Place the unsalted butter in a large saucepan over medium heat. Stir constantly as it melts and begins to foam. After about 5-7 minutes, it will turn a golden-brown color and smell nutty. Be careful not to burn it! Immediately remove from heat.
- Add marshmallows: To the browned butter, add the mini marshmallows. Stir continuously until the marshmallows are completely melted and the mixture is smooth, about 3-5 minutes.
- Mix in salted caramel: Pour in the salted caramel sauce and stir until fully incorporated. The mixture should be glossy and thick.
- Combine with cereal: Transfer the saucepan off the heat. Add the Rice Krispies cereal in batches, folding gently with a spatula to coat every piece evenly without crushing the cereal.
- Add dark chocolate: While the mixture is still warm but not hot, fold in about 3/4 cup (130g) of the dark chocolate chips. The heat will soften the chips slightly, creating pockets of melted chocolate.
- Press into pan: Quickly spread the mixture evenly into the prepared 9×13 inch pan lined with parchment paper. Use a buttered spatula or wax paper to press down firmly but gently to avoid compacting the treats too much.
- Top with remaining chocolate and sea salt: Sprinkle the remaining 1/4 cup (40g) of dark chocolate chips evenly on top, pressing lightly so they stick. Finish with a light dusting of flaky sea salt.
- Cool and set: Let the treats cool completely at room temperature for about 1 hour to firm up. For faster setting, place in the refrigerator for 20-30 minutes.
- Slice and serve: Once set, lift the treats out using the parchment paper and cut into squares with a sharp knife. Enjoy immediately or store as described.
Notes
Use parchment paper to line the pan for easy removal and cleanup. Stir butter constantly when browning to avoid burning. Use mini marshmallows for better melting. Press mixture firmly but gently to keep treats light and crispy. Add most chocolate chips into warm mixture and rest on top for melted pockets and glossy finish. Chill treats for faster setting if needed.
Nutrition
- Serving Size: 1 square (approximat
- Calories: 225
- Sugar: 18
- Sodium: 150
- Fat: 11
- Saturated Fat: 6
- Carbohydrates: 30
- Fiber: 2
- Protein: 3
Keywords: brown butter, salted caramel, rice krispie treats, dark chocolate, easy dessert, homemade treats, quick dessert, crowd-pleaser


